Was this page helpful?
Configure AWS Transit Gateway (TGW) VPC Attachment Connection
Available with the Premium plan
ScyllaDB Cloud allows you to connect your application’s private network to the ScyllaDB clusters by using AWS TGW VPC Attachment Connection. By following this guide, you will establish a network connection from your VPC to a cluster datacenter via TGW.
There are two AWS TGW VPC Attachment Connection options:
RAM Shared Option
RAM Shared option allows you to connect to a TGW from another account. With this option, TGW is shared with Cluster AWS Account via RAM.
Note
This is the only option that is available for clusters deployed on ScyllaDB Cloud AWS Account (Non-Bring Your Own Account clusters).
Note
RAM can be re-used across connections and clusters within one ScyllaDB Cloud Account.
For more information on AWS TGW VPC Attachment and its advantages, see AWS TGW documentation and AWS TGW VPC Attachment documentation.
Workflow
Launch a ScyllaDB Cloud cluster on AWS with the VPC Peering / Transit Gateway option enabled.
Set up AWS TGW VPC Attachment Connection.
Create AWS TGW VPC Attachment Connection on ScyllaDB Cloud.
Route traffic via TGW.
Set Up AWS TGW VPC Attachment Connection
Prerequisites
Find target AWS Region: AWS TGW is a regional service; you have to deploy it on the same region where the cluster is running.
AWS TGW can entail additional traffic charges; make sure that you read and understand AWS TGW Pricing.
Decide on the option that suits your case: Non-shared option or RAM Shared option.
Setup
Step 1. Create TGW
Open AWS Cloud Console at VPC> Transit Gateways.
Pick Target Region, which should be the same region where the target cluster is running.
Click Create transit gateway.
Set Name.

(Optional) Set Auto accept shared attachments to make your TGW automatically accept attachment requests from other accounts.

Click Create transit gateway and wait until TGW is created.
Go back to VPC> Transit Gateways.
Find TGW you just created.

Copy the ID of TGW. You will need it to create a connection on ScyllaDB Cloud.

Step 2. Attach your VPC to the TGW
Click Create transit gateway attachment.
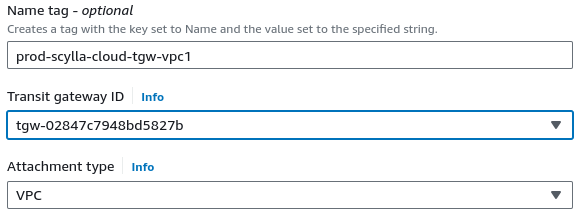
Set Name, Transit gateway ID to ID of TGW you just created, Attachment type to VPC.
Set VPC ID to a VPC you want to connect to the cluster.
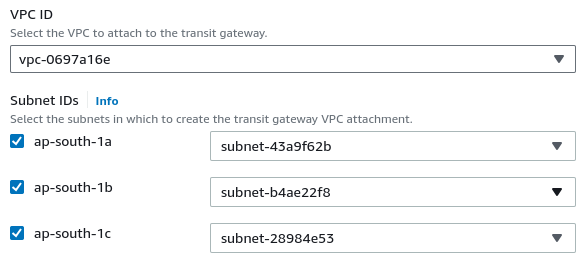
Pick subnets for all AZs you want to have access to the cluster.
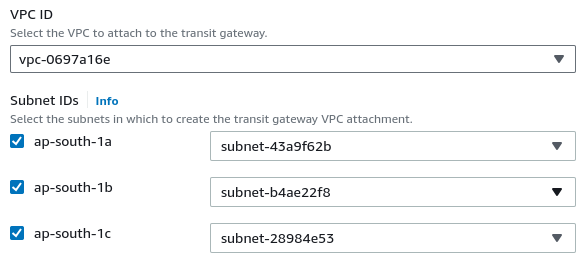
Click Create transit gateway attachment.
Create AWS TGW VPC Attachment Connection on ScyllaDB Cloud
Go to ScyllaDB Cloud> My Clusters.
Find the target cluster.
Click ADD CONNECTION. You can add a connection only after the cluster is fully provisioned.
Click Add Transit Gateway Connection and fill in the following information:
Name - Enter the name of the cluster connection.
Data Center - Choose the datacenter you want to connect to the TGW.
AWS RAM ARN - Enter the ARN of the RAM created as described in the Share TGW with ScyllaDB Cloud AWS Account section or leave it empty if you choose the Non-shared option.
AWS Transit Gateway ID - Enter the ID of the TGW created as described in the Create TGW section.
AWS VPC CIDRs - Enter a list of networks that you want to expose to the cluster via this connection.
Click Add Transit Gateway and wait for it to become ACTIVE.
Route Traffic from the Application to the Cluster via TGW
Caution
If you already have another connection to the cluster that is currently in use, following these steps may cause traffic interruption. To avoid it, see Migrating Cluster Connection.
Open AWS Cloud Console at VPC> Route tables.
Find and select the main route table for your VPC (the one that has Yes in the Main column).
Click Actions> Edit routes.
Click Add route.
Enter Target Cluster Datacenter CIDR to a Destination column, pick Transit gateway for Target, and choose your TGW from the drop-down list right below it.

Check cluster availability; see Checking Cluster Availability.
Troubleshooting Transit Gateway Connection
Connection stuck at stage: waiting client to accept tgw attachment
Reason
AWS TGW is not configured with Auto accept shared attachments enabled.
How to fix it
You can fix it in one of the following ways:
- I. Fix TGW to auto-accept attachments:
Note
These steps won’t accept any pending attachments. In order to accept pending attachments, please follow Manually accept TGW attachment.
Open AWS Cloud Console at VPC> Transit Gateways.
Pick AWS Region, which should be the same region where the target cluster datacenter is running.
Find your TGW (using TGW ID) and click Actions> Modify transit gateway.
Select Auto accept shared attachments to make your TGW automatically accept attachment requests from other accounts.

Click Modify transit gateway.
- II. Manually accept TGW attachment:
Note
Make sure that the connection is not failed by timeout. If it is, delete it, recreate it, and when it gets to the waiting client to accept tgw attachment stage, proceed with the steps below.
Find the attachment pending acceptance by TGW Attachment ID.

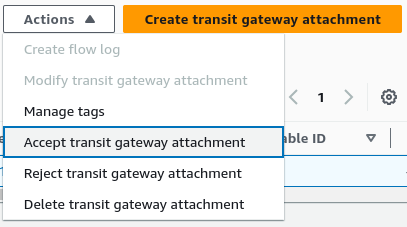
Accept the attachment.
